Snowflake
This page provides information for connecting your application to your Snowflake database and using queries to manage its content.
Connect Snowflake
If you are a cloud user, you must whitelist the IP addresses 18.223.74.85 and 3.131.104.27 of the Appsmith deployment, as well as your own machine's IP address. See Snowflake's Network Policies docs for more details.
Connection parameters
The following section is a reference guide that provides a complete description of all the parameters to connect to a Snowflake database.
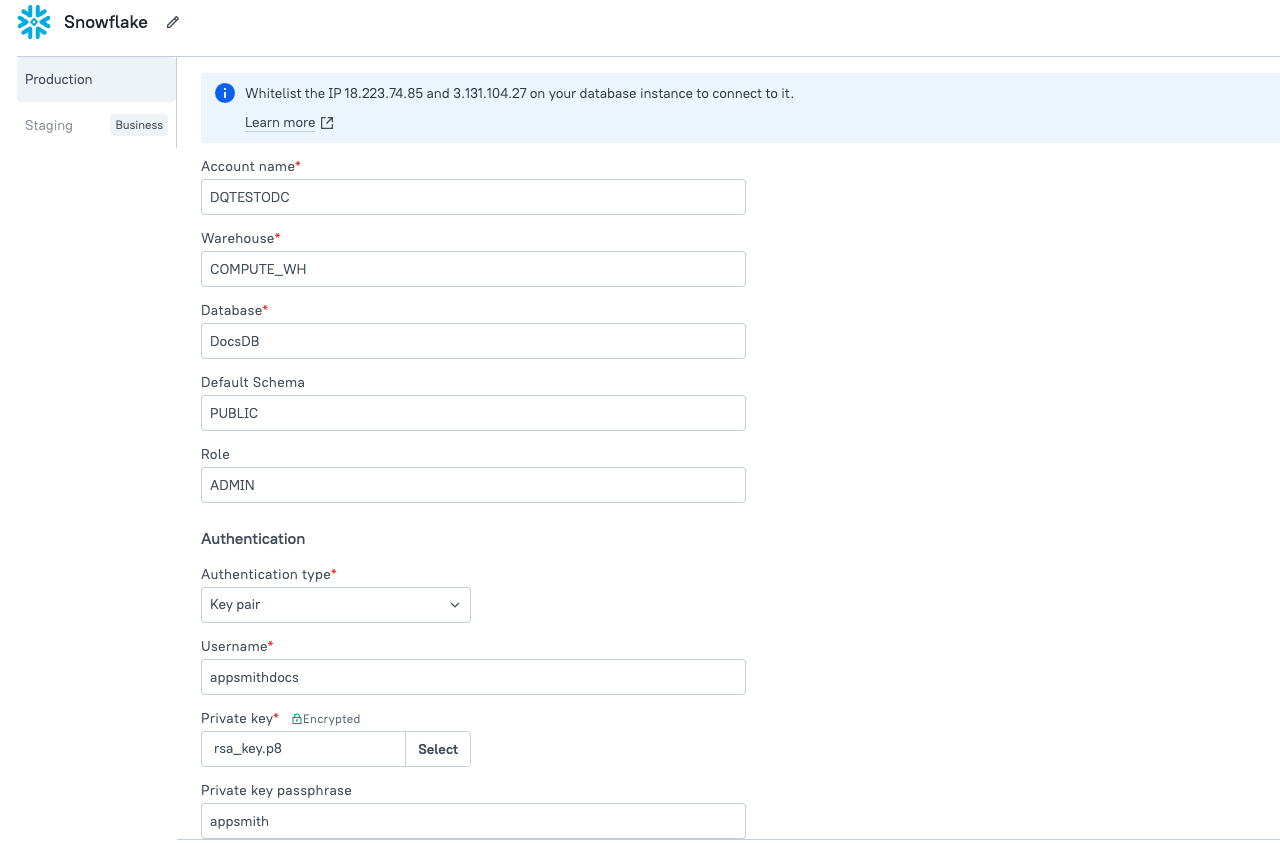
Account Name
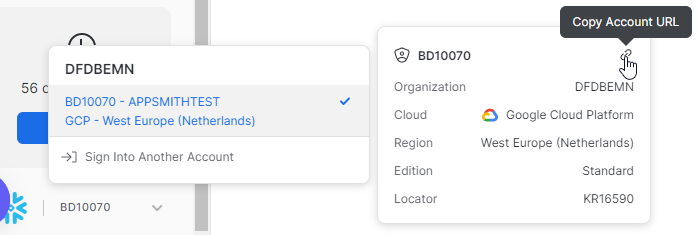
This field expects an identifier for your Snowflake account. This consists of your organization name and your account name separated by a hyphen: orgName-accountName.
To locate your organization name and account details on the Snowflake dashboard, navigate to the bottom-left corner of the page. Copy the Account URL, and then exclude both the prefix https:// and the suffix .snowflakecomputing.com from the URL. For example:
Account Name: gv14678.central-india.azure*
Warehouse
Specifies the virtual warehouse to use once connected.
To get the warehouse name, navigate to Admin > Warehouses on the left panel, and find the warehouse name in the top-right corner of the Admin section. For example, COMPUTE_WH
Database
Specifies the database to use once connected.
To get the database name for connection, go to Data > Databases in the Snowflake dashboard, and select the desired database. For example, TEST_DB.
Default Schema
Defines the database schema structure for preview in the Appsmith sidebar, showcasing tables and columns; note that this setting does not restrict your ability to query different schemas.
To get the Default Schema, navigate to the Schemas section and copy the desired Schema name along with the corresponding Role. For example, TPCDS_SF100TCL.
Role
The role to use for performing queries. For example, ACCOUNTADMIN
Authentication type
Basic
Basic authentication is a simple method that uses a username and password to authenticate users to Snowflake.
-
Username - The username is the unique identifier for your Snowflake account. It is typically assigned by your Snowflake administrator or created when you set up your Snowflake account. You can find your username in your Snowflake account settings.
-
Password - The password is the secret string of characters used in combination with your username to authenticate your identity to Snowflake. You can find your password in your Snowflake account settings.
Key Pair
Key Pair authentication is a secure method that uses a pair of cryptographic keys for authentication, providing enhanced security. For more information, see Key-pair authentication.
-
Username - The username is the unique identifier for your Snowflake account. It is typically assigned by your Snowflake administrator or created when you set up your Snowflake account. You can find your username in your Snowflake account settings.
-
Private key: The private key is a confidential cryptographic key used to sign authentication requests. It is generated during the key pair creation process and should be kept secure and encrypted. You can upload the private key file from your local machine.
-
Passphrase: The passphrase is an optional password that you set when generating the private key. It adds an extra layer of security by encrypting the private key file.
To generate keys for secure authentication, you can use tools like OpenSSL. With OpenSSL, you can create two keys: a private key and a public key. The private key, encrypted with AES-256, is used for signing authentication requests, while the public key is extracted from the private key for verification purposes. For more information, see How to generate the private key.
To use the keys:
-
Public Key: Upload the public key to your Snowflake user profile. This can be done through the Snowflake web interface or using SQL commands. The public key will be used by Snowflake to verify the signatures created with your private key.
-
Private Key: Store this private key on your local machine and use it to configure the datasource in Appsmith. You can use the same key for multiple authentication.
Query Snowflake
The following section provides examples of creating basic CRUD queries for Snowflake.
Fetch data
SELECT * FROM customer
OFFSET {{ CustomerTable.pageOffset }} ROWS
FETCH NEXT {{ CustomerTable.pageSize }} ROWS ONLY;
In the above example, CustomerTable is the name of the Table widget used to display the data using server-side pagination to control how much data is queried at once.
Insert data
INSERT INTO customer
  (id, name, address, email)
VALUES
(
  DEFAULT,
  {{ NameInput.text }},
  {{ AddressInput.text }},
  {{ EmailInput.text }}
);
In the above example, NameInput, AddressInput, and EmailInput are the names of the widgets used to capture input from the user for name, address, and email fields, respectively.
Update data
UPDATE customer
  SET email = {{ EmailInput.text }}
  WHERE id = {{ CustomerTable.selectedRow.id }};
In the above example, EmailInput is the name of the Input widget used to capture the email entered by the user. CustomerTable is the Table widget where the user selects the row to update the user's email.
Delete data
DELETE FROM customer WHERE id = {{ CustomerTable.selectedRow.id }};
In the above example, CustomerTable is the name of the Table widget where the user selects the row for deletion.
Troubleshooting
If you are experiencing difficulties, you can refer to the Datasource troubleshooting guide or contact the support team using the chat widget at the bottom right of this page.
See also
- Display and Lookup Data in Table - Learn how to display query results in a Table and enable users to look up data with ease.
- Search and Filter Table Data - Guide on adding search and filter functionality to Tables for better data navigation.
- Update Data - Understand how to update data in your application using Form widget.
- Insert Data - Step-by-step instructions on inserting new records into your database using Form widget.